Since I started to sell my paintings, I have been searching a proper shipping method. I watched and read several 'how to' videos and articles about packaging. I adopted little bit from here and there and developed my own. While searching, I figured that four things are most important in terms of packing flat art :
Over all purpose of packing is a safe delivery during transit. So my packing method is based on those four and this is how I pack my paintings.
- Protecting surface of painting
- Adding pads
- Guarding corners
- Preventing water damage
Over all purpose of packing is a safe delivery during transit. So my packing method is based on those four and this is how I pack my paintings.

What I use for packing
1. Acid free tissue paper/ 2 scrap hard boards / 3. foam sheet/ 4. tapes, scissors,cutter and ruler
5. 'Do not bend' stickers / 6 shipping box / 7. paintings / 8. poly wrap / 9. my toe :)
1) Protect the painting surface
According to the article I've read ( I wish I could link it but unfortunately, I can't find the article), it is important to avoid the materials that would make any residue or mark on painting surfaces. Acid free, archival quality papers or poly bags are recommended by many articles.
Purpose of this stage : covering paintings from dirt and scratches
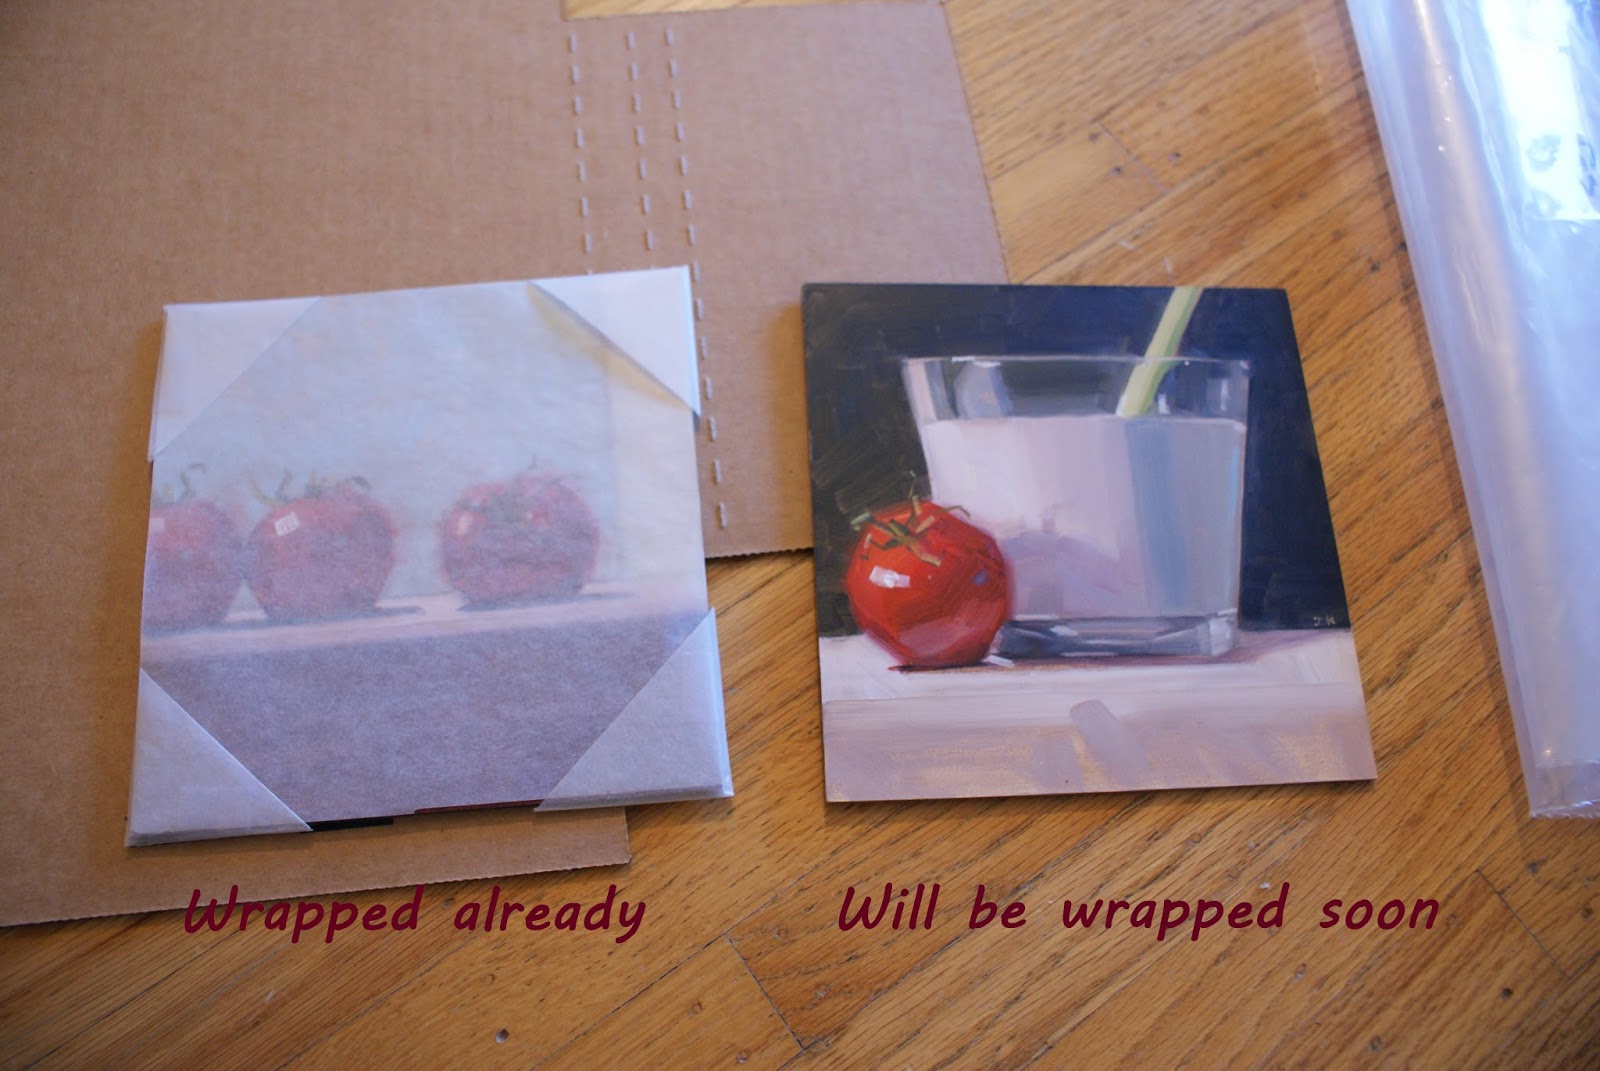
I have already wrapped one ( left ) with an acid free tissue paper to show what it would look like after covering painting. And I will demonstrate with the other one( right)

Before starting packing, I write title, measurement, material, creation date and signature at the back side of painting. ( I use a gold/ silver metallic sharpie )

And then mark on and cut the tissue paper
(I used semi transparent acid free tissue paper, but Glassine paper would be better )

I prepare two sheets (to cover front and back.)
Also cut 4 small squares to make pockets.
These will protect each corners of painting

Fold each small squares diagonally two times to create a triangle pocket

Tape the sides of triangle pockets.

It makes nice opening

Place the pieces of papers front and back of painting ( like a sandwich )
and then place the pockets onto each corners
and then place the pockets onto each corners

This is back side

Secure the pockets with tapes on back side
Taping should go only onto the tissue paper.
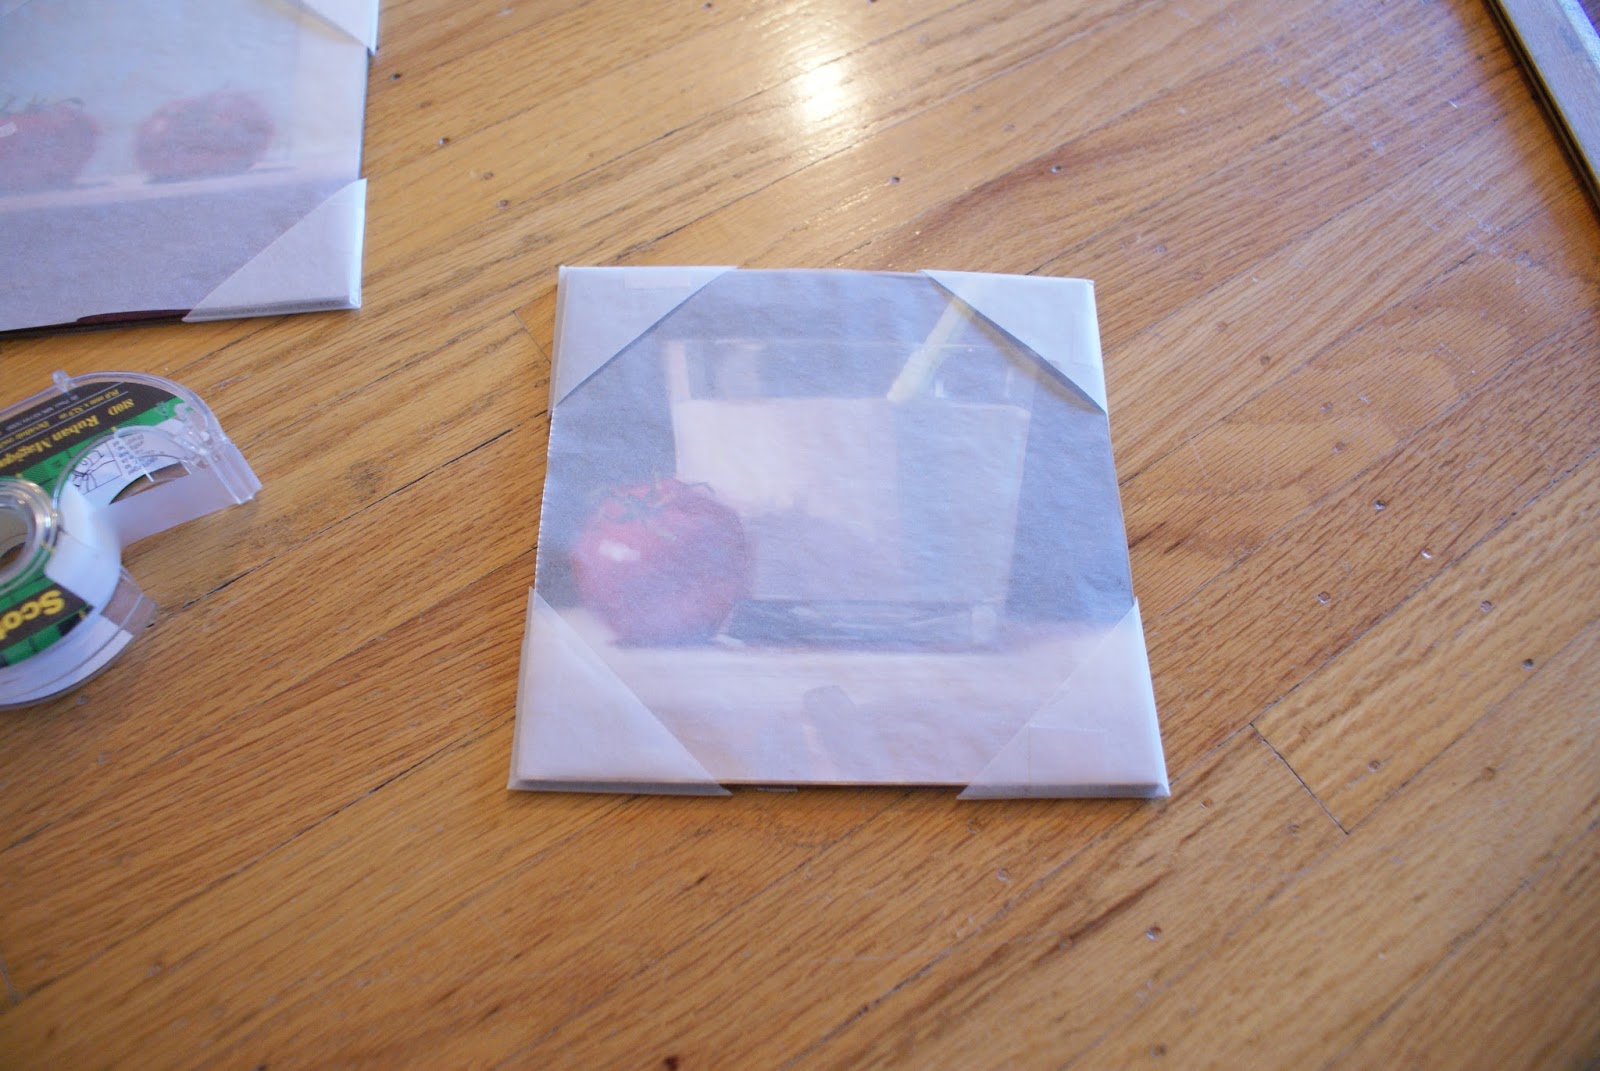
The front look (taping free )
Now the painting's surface is protected from dirt and scratch
and next step is to put some padding.
Now the painting's surface is protected from dirt and scratch
and next step is to put some padding.
** this stage can be replaced by putting your painting simply into a clear plastic bag **
( I am also thinking to replace this stage by using poly bags when I am out of tissue paper )
2) Adding pads
Purpose of this stage : cushioning paintings against breakage

Prepare two pieces of hard boards that are little wider than an actual painting.
( and foam sheet as well )
( and foam sheet as well )
I collect hard boards from recycling bins - Costco is the best place to find nice & clean ones
Also I save and reuse foam sheets that come with china or canvas panels

(left ) hard board size compare to actual painting size
(right) example of layers for wrapping another sandwich.
(right) example of layers for wrapping another sandwich.

Side view of the sandwich
sandwich recipe :
( hard board - foam sheet - painting - foam sheet ( optional ) - hard board )
sandwich recipe :
( hard board - foam sheet - painting - foam sheet ( optional ) - hard board )

Tighten each side of the sandwich with masking tape.
Write the tile of painting on the hard board right after taping.
When you are packing more than one painting at the same time,
This will help to identify which one is which.
If the paintings are the same size, they look all same after this stage.
If the paintings are the same size, they look all same after this stage.
(One time, I had to unpack and see which painting was inside.)

Two paintings are packed and their titles have been written on
and ready for corner works now.
3) Guarding Corners
Purpose of this stage : protecting corners

There are many pre-made corner protectors but they are quite pricy.
So I make them with scrap hard boards.
8 pieces are needed since 2 pieces will make one corner protector.

put 2 pieces together (90 degree angle) and tape it.


slide them onto each corner

done !
4) Prevent moisture
Purpose of this stage : protecting against water damage ( rain, snow or water spills )

Cover the package with a plastic wrap
and use box tape to seal all areas where moisture can enter.

Done !

Place it into a shipping box.
I put a thank you card and invoice at this stage ( not showing in this photo though )


Seal the box and attach a shipping label and 'do not bend' or 'fragile' stickers
and it's ready to ship.
*** If shipping box is too big compare to painting size, crumple news papers and fill the gap. Then the painting won't shift in the box during carriage ***
So this is how I pack my paintings. Hope this helps the artists who needs packing ideas. And I am attaching a video that I referred to the most about packing flat art. It will help you too.
Thank you !!!
JK, I cannot believe you've received no comments as this is one of the best posts I have ever seen. Well done and thank you for taking the time to share these excellent tips.
ReplyDeleteSharon x
Thank you, SMV. I am very glad to hear that you find this post helpful. :D
Delete